5 Steps: Migrate DNS Service From GoDaddy To AWS Route 53
Migrating your DNS service from GoDaddy to AWS Route 53 is relatively straightforward. Here is a simple guide with step-by-step instructions to help you through the process:
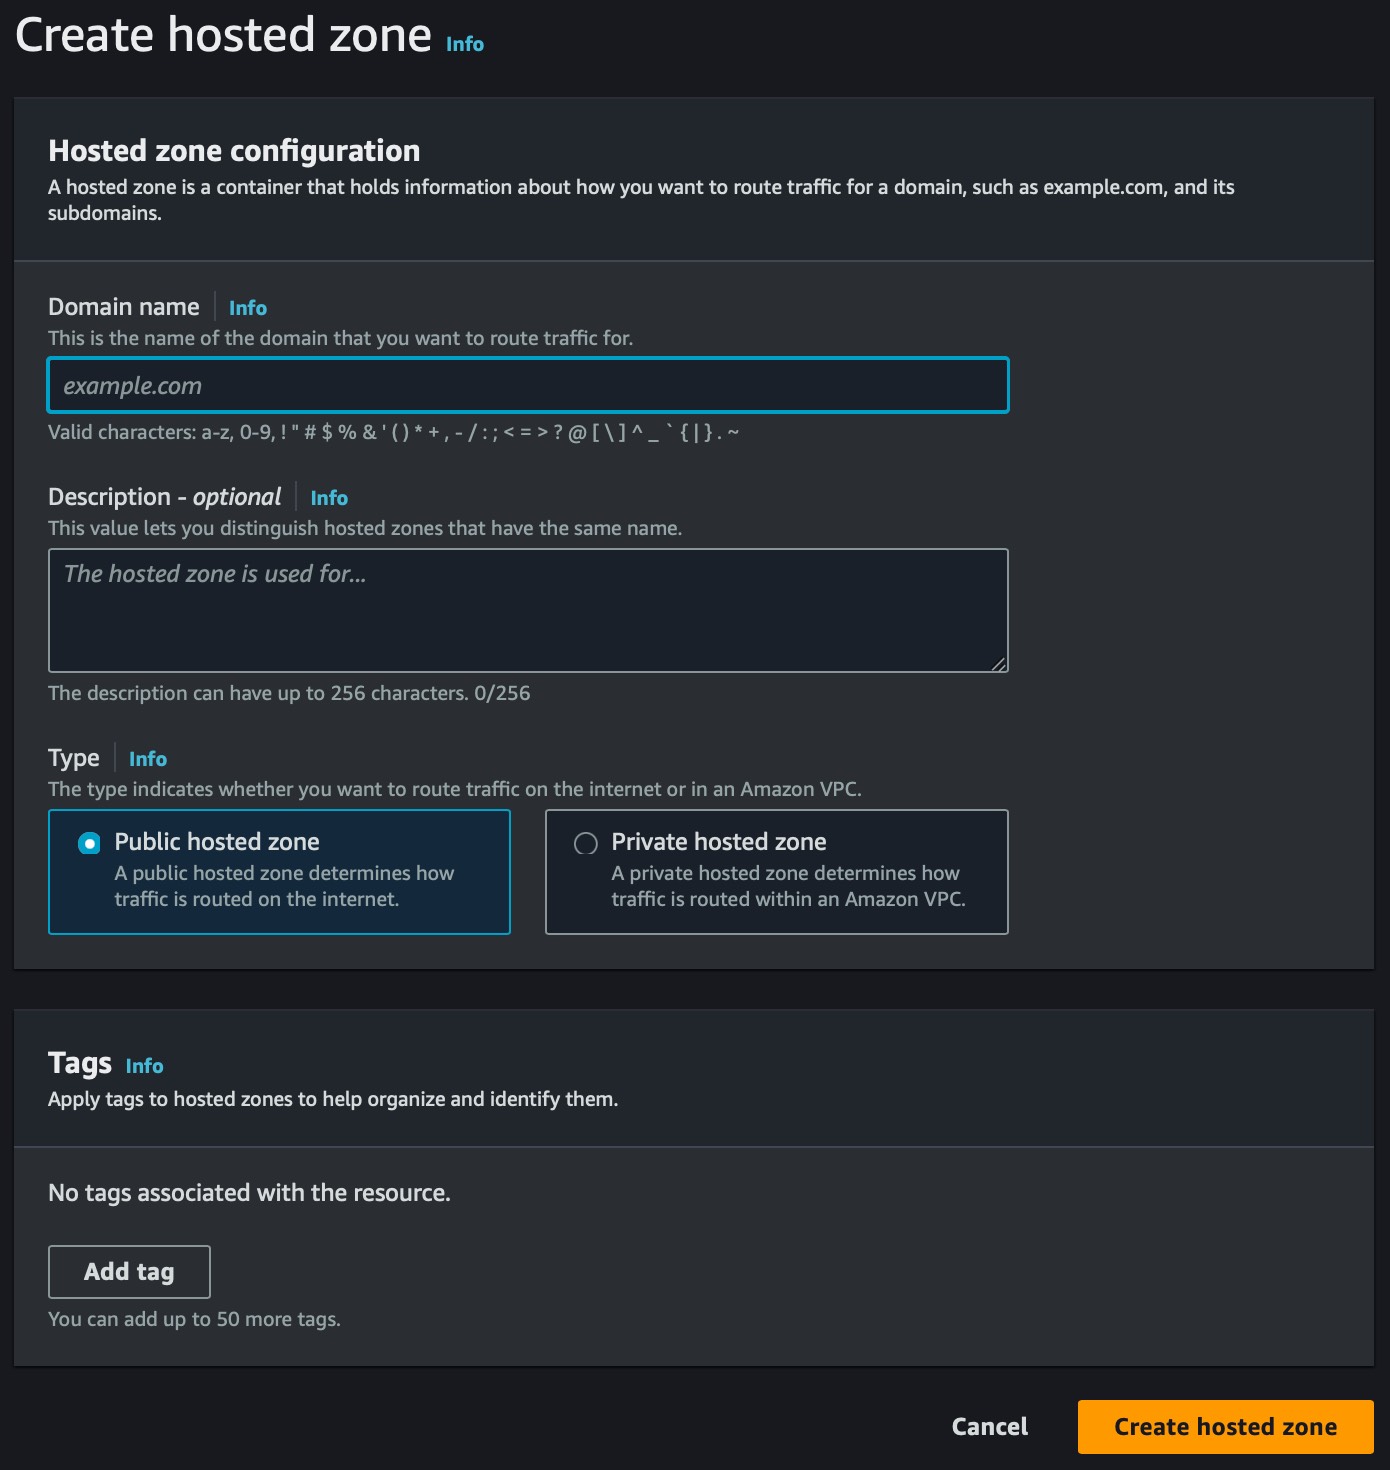
Step #1: Create Hosted Zone
The first step is to create a new Route 53 Hosted Zone. To do this, log into your account, navigate to the Route 53 dashboard, look for the "Create hosted zone" button, and click on it. Enter your domain name, select the "Public hosted zone" option, and click the "Create hosted zone" button to complete the process.
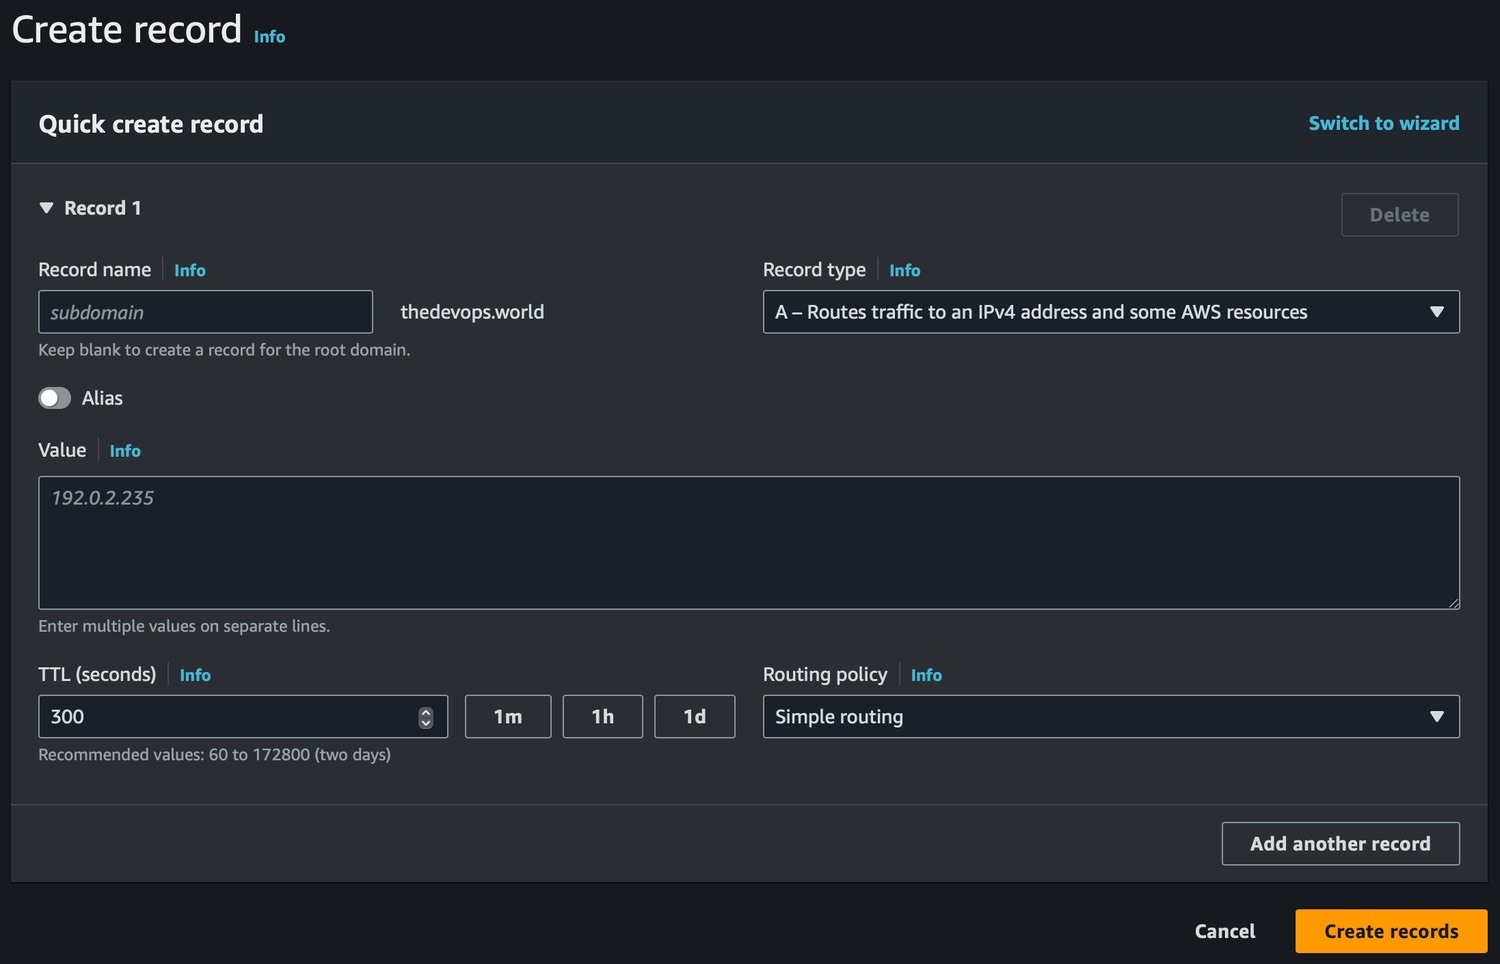
Step #2: Import DNS Records
Before going further, you should import your existing DNS records (A, CNAME, MX, TXT, etc.) from GoDaddy. Within the Hosted Zone you created, click on the "Create record" button. Enter the relevant details for your DNS record(s) and click the "Create records" button to save your changes.
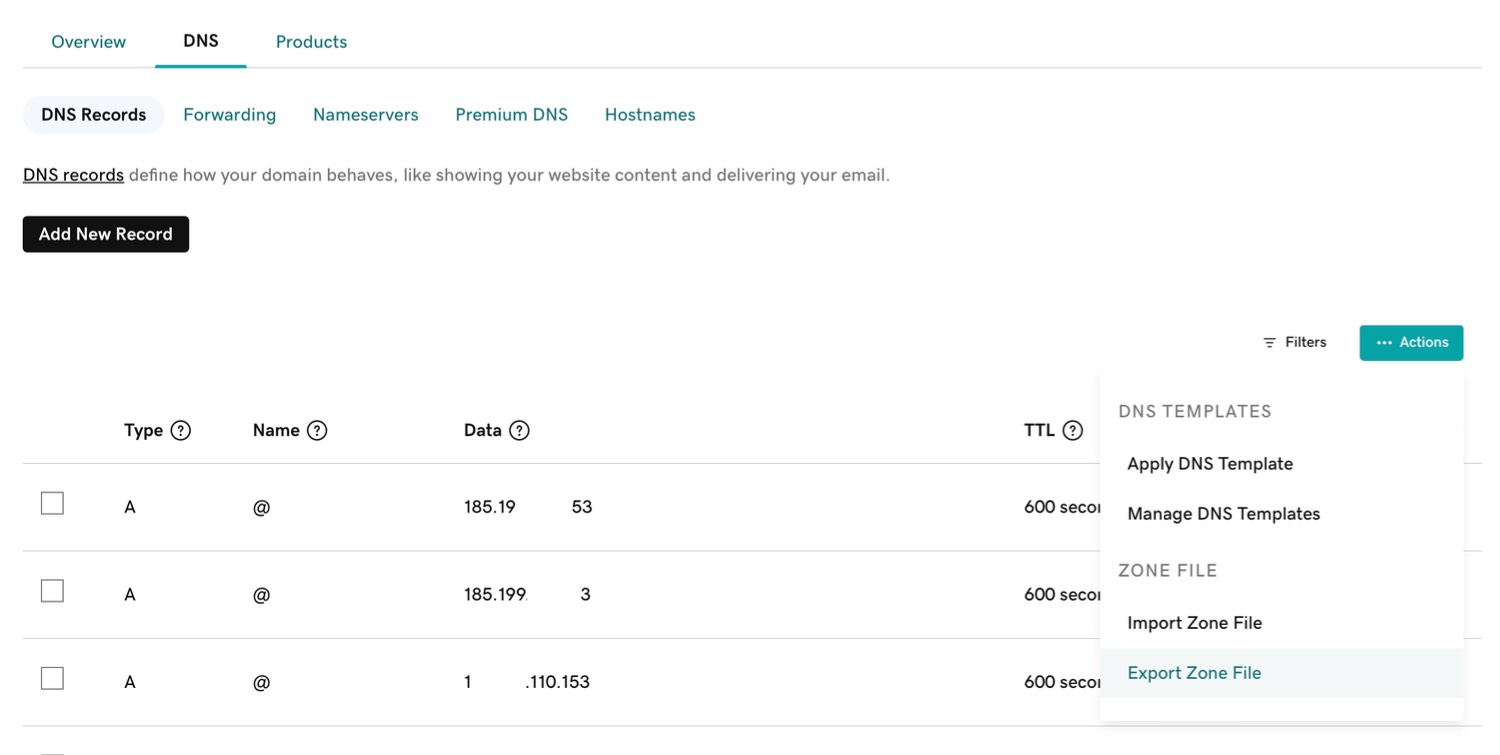
If you have a large number of records. You can export the existing records from GoDaddy and import them into Route 53. To do so, log in to your GoDaddy account, find and click on "My Account", then click on the "Domains" section. From here, click on the domain you want to export the records, then click on the "DNS" tab. Within the "DNS Records" view, click on the "... Actions" button and then on the "Export Zone File". This action will download a file with the records on your machine. Open the file and copy the contents of it.
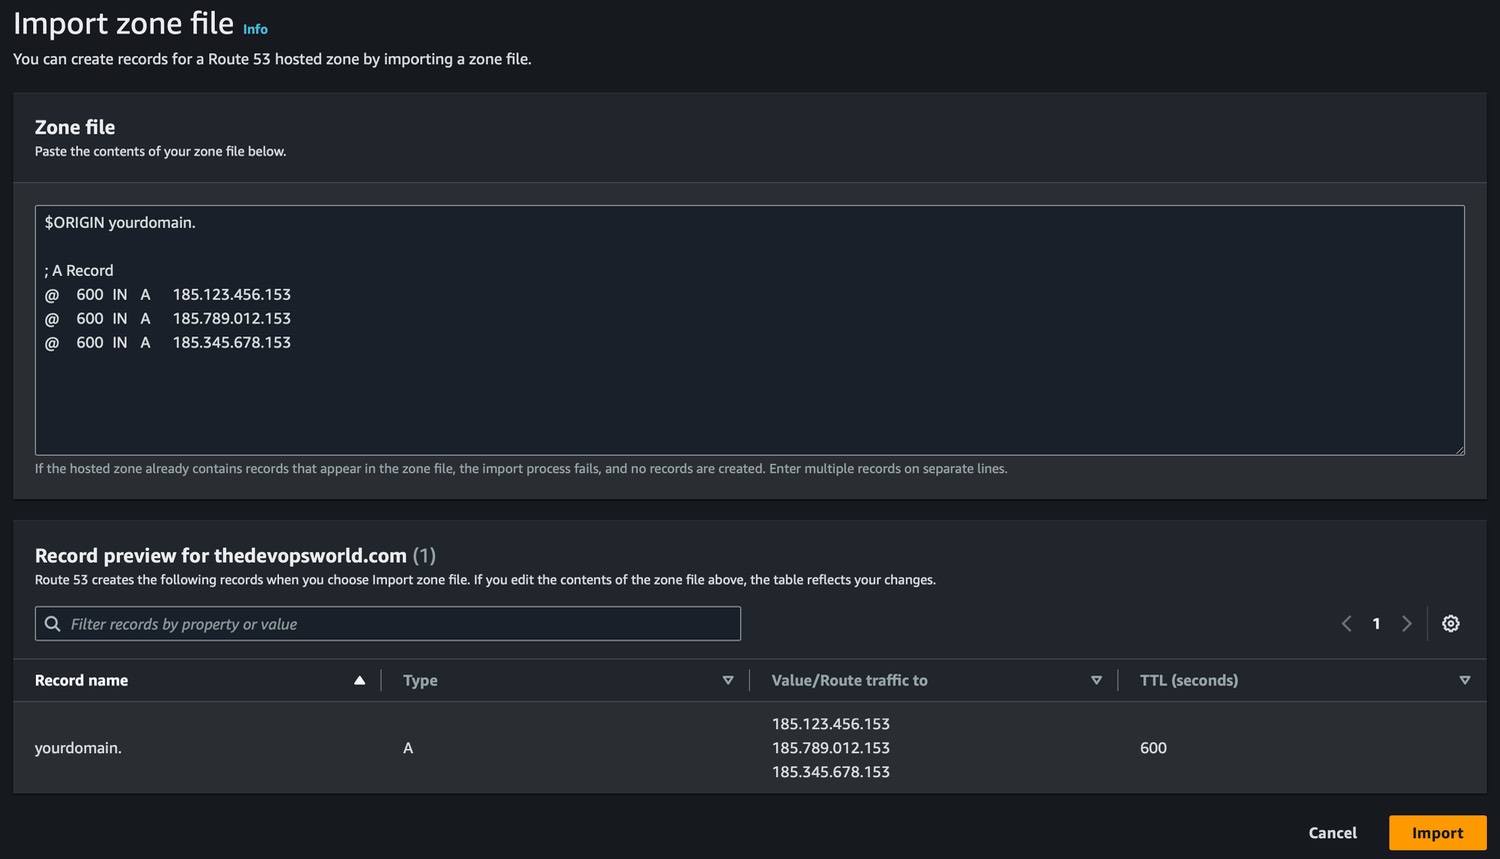
In the Route 53 dashboard, click on the Hosted Zone you created earlier and click the "Import zone file" button. Within the Import zone file view, paste the contents of the file you copied previously. When done, click the "Import" button to save your records.
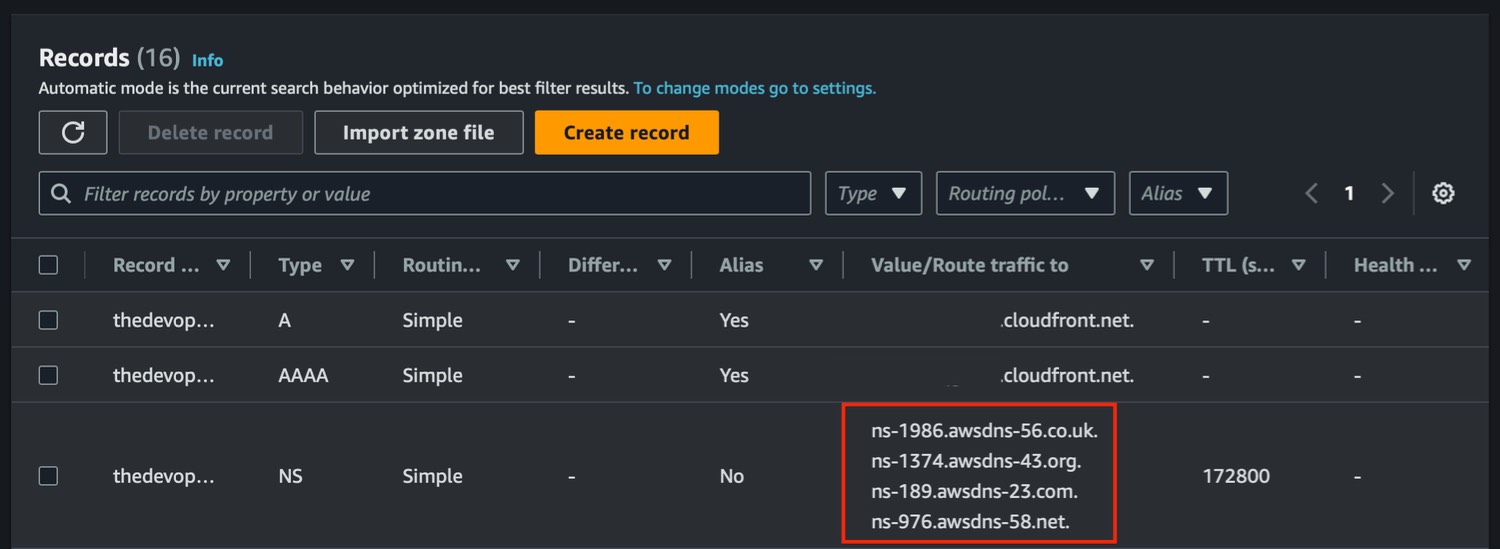
Step #3: Get Hosted Zone Nameservers
Within the Hosted Zone you created, look for, and copy the nameservers listed under the "NS" record. You will need them in the next step.
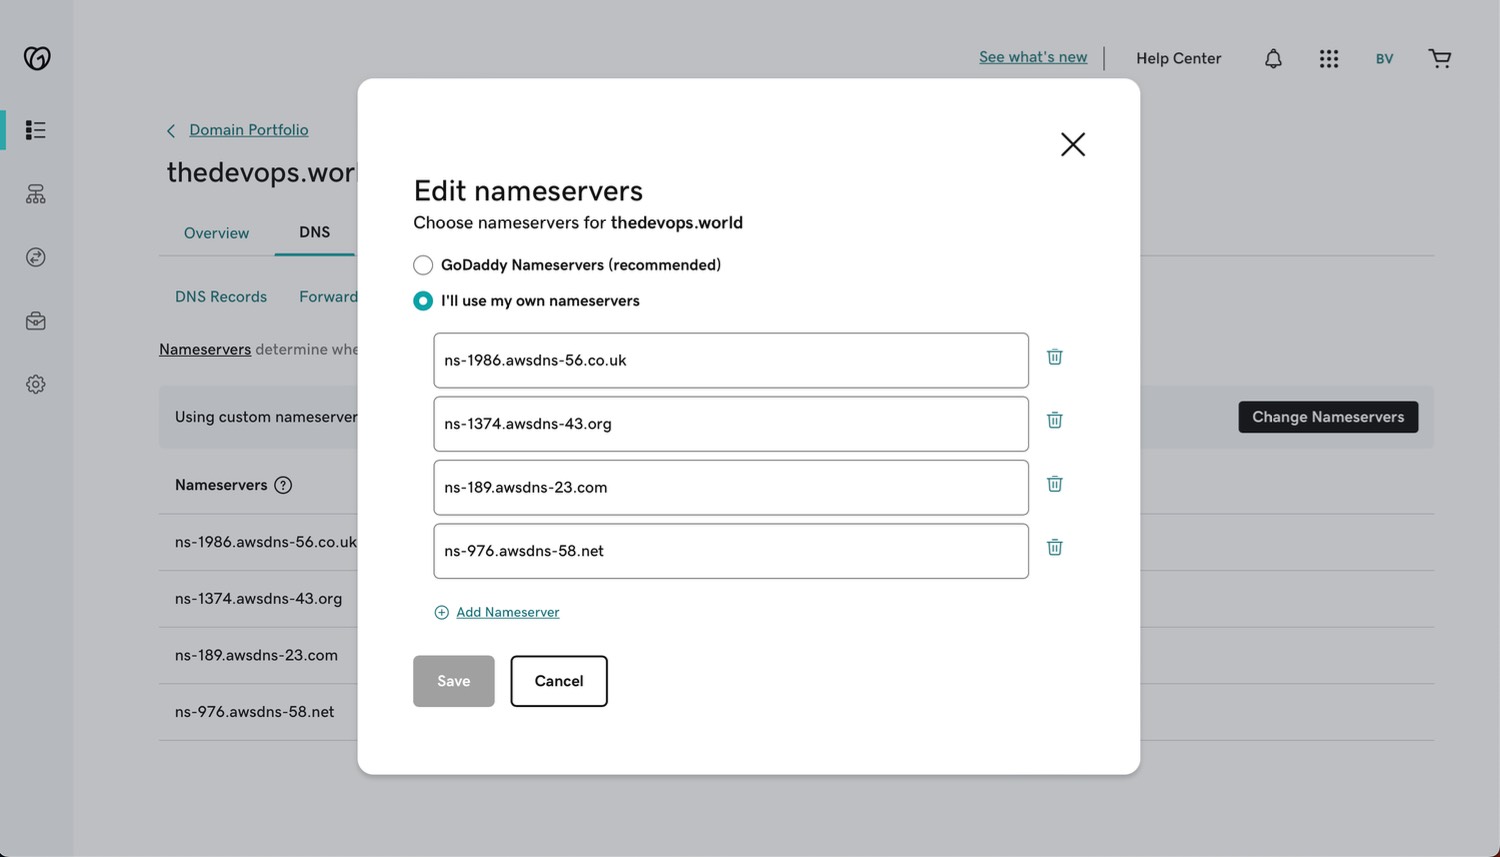
Step #4: Update Nameservers on GoDaddy
In your GoDaddy account, click on "My Account" and then on the "Domains" section. Click on the domain you want to update, then click on the "DNS" tab. Find the "Nameservers" section and click on "Change Nameservers". Select "I'll use my own nameservers" and enter the Route 53 nameservers you copied earlier. Click on the "Save" button to save your changes.
Step #5: Wait for DNS Propagation
DNS propagation can take up to 48 hours to complete. Please be patient and wait for the DNS propagation to complete before making further changes. In the meantime, you can read this article to learn more.
That's all! You moved your DNS service from GoDaddy to AWS Route 53. From now on, all your DNS records and configurations will be handled through Route 53.
Bonus: Provision Route 53 Hosted Zone and Records with Terraform
If you want to set up the Route 53 Hosted Zone and Records as infrastructure as code (IaC), you can use the following terraform configuration example.
resource "aws_route53_zone" "example_zone" {
  name = "yourdomain.com"
}

resource "aws_route53_record" "example_record" {
  zone_id = aws_route53_zone.example_zone.zone_id
  name    = "yourdomain.com"
  type    = "A"
  ttl     = 60
  records = [
    # "your server IP"
  ]
}

resource "aws_route53_record" "www_example_record" {
  zone_id = aws_route53_zone.example_zone.zone_id
  name    = "www.yourdomain.com"
  # ...
}

output "example_zone_nameservers" {
  value       = aws_route53_zone.example_zone.name_servers
  description = "The nameservers of example_zone hosted zone"
}